

Gilded pumpkins are a beautiful Halloween alternative to the standard carved Jack o’ Lantern. Antiqued gold leaf transforms the common pumpkin into something extraordinary.
Because the insides of decorated pumpkins are not exposed to air like their carved counterparts, gold leaf pumpkins will last a lot longer, usually about a month. This means they can adorn your home for both Halloween and Thanksgiving. Since it does require some time investment, you may even want to consider gilding an artificial pumpkin so you can keep your work of art for next year.
Materials
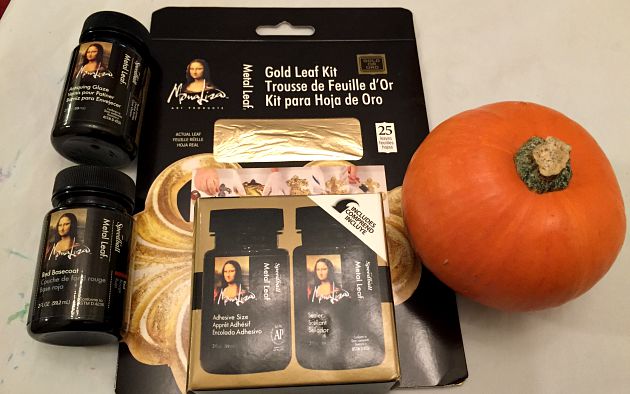
- Pumpkin (natural or artificial)
- Gold leaf kit (includes gold leaf sheets, adhesive size and sealant)
- Paint brushes (foam and bristle)
- Red basecoat (optional)
- Antiquing glaze (optional)
- Cheesecloth (optional)
How to Make Gold Leaf Pumpkins
You will need to decorate your pumpkin in two stages. It doesn’t matter if you work top to bottom, bottom to top or side to side so long as you let your pumpkin dry thoroughly between each stage.
STEP 1:
Wash and thoroughly dry your pumpkin. Starting with a clean, dry surface is ideal and helps everything stick to the pumpkin better.
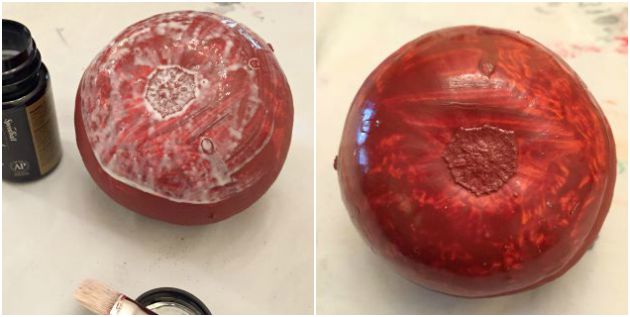
STEP 2: (optional)
Traditionally objects being gilded were prepared by applying a red basecoat. Red Oxide was the medium of choice by gilders because it enhanced the natural brilliance of the gold and this technique was referred to as ‘Old World Gilding’.
Because I’m a purist at heart I love to include this step. The natural orange color of the pumpkin probably will enhance the gold but for a truly antique look it’s best to start with a red basecoat.
I brushed this on in two stages starting with the top half and then completing the bottom half after the top was dry.

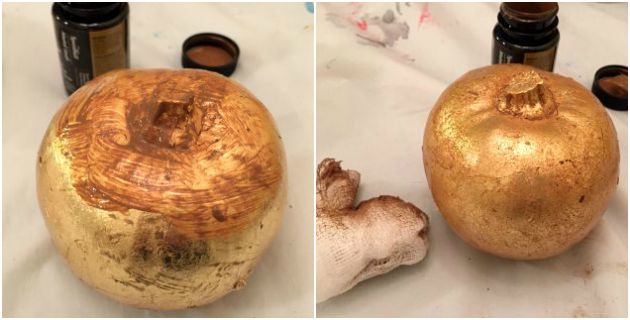
STEP 3:
Once your basecoat is dry you can apply the adhesive size. It goes on kind of milky and then dries sticky and clear. I decided to start with the bottom third of the pumpkin.
STEP 4:
Apply a sheet of gold leaf over the sticky adhesive. Run a dry brush over top to help stick the leaf onto the adhesive. Tear off any excess leaf and set this aside for later.
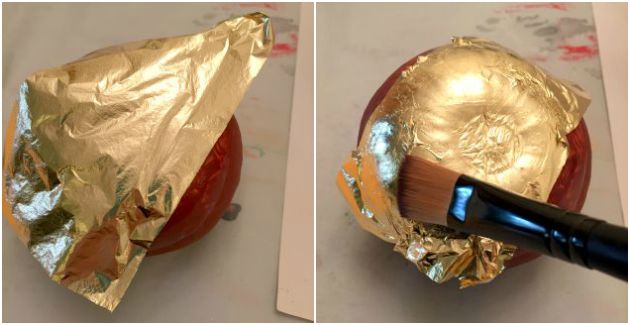
Repeat steps 3 & 4 with the rest of the pumpkin.

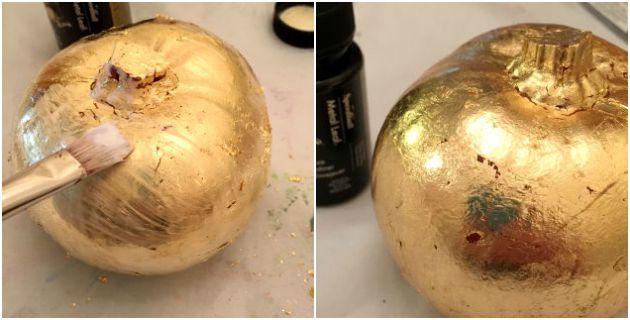
STEP 5:
Check for any areas you may have missed. I like to let a little bit of the red basecoat show through the cracks but if there are any large gaps then now is the time to fix this. Apply adhesive size to the gaps, if needed, and then use your leftover gold leaf scraps to fill in the gaps.
Use your dry brush to brush off any excess gold leaf.
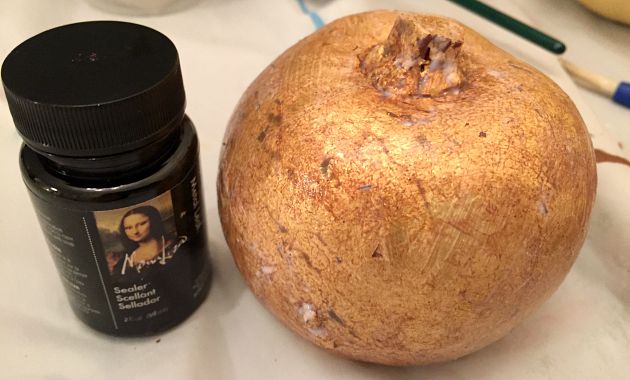
STEP 6:
Apply a coat of sealant to one half of your pumpkin and then the other half once the first half is dry.
If you like the bright appearance of your pumpkin you can stop right now and you’re done. But if you want an antique look then keep going with the next steps.
STEP 7:
Working in small sections apply the antique glaze with a paint brush. Pat the glaze with a piece of cheesecloth. Keep going until you have covered the whole pumpkin.
STEP 8:
Apply a final coat of the sealant.
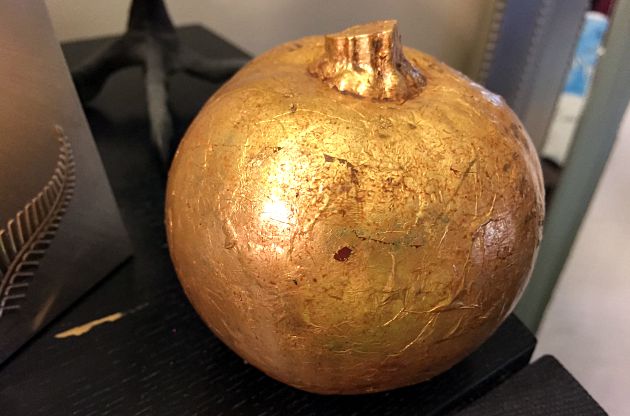
Congratulations! You can now proudly display your beautiful pumpkin.
Happy Halloween!
No comments yet.