Whether you don’t have time to carve a pumpkin, you don’t like the mess of pumpkin carving or you just want to do something different for Halloween, decorating a pumpkin with glitter is easy and gorgeous. It’s also a great craft idea for both adults and kids.
One great advantage of decorating vs carving pumpkins is that your creations will last much longer. If you jazz up a real pumpkin with glitter it will last about a month and you can have it for both Halloween and Thanksgiving. But if you decorate a synthetic pumpkin then it will last for years.
In this tutorial I’ll show you how to make glitter pumpkins. I’ll also show you easy ways to create different looks with your pumpkin just by changing up your supplies.
What You Need to Make Glitter Pumpkins
- Pumpkins. Whether real or synthetic, think about what size you want. Are you making large pumpkins for your front steps or dainty little pumpkins for your mantle or table centerpiece? Maybe you want to mix it up and do a variety of sizes.
- Glitter. Think about your color scheme. Are you sticking to traditional Halloween colors? Or are you flying in the face of tradition and incorporating alternative colors such as delicate pastels or bright hues? You’ll also have to choose which size glitter to use (coarse, fine or extra fine). I’ll show you the differences later on.
- Glue or acrylic paint. You’ll need either one of these to stick the glitter onto the pumpkin.
- Paint brushes.
- Construction paper or placemat.
- Paper plate or bowl. (Optional)
- Sealant such as Mod Podge Spray Sealer, Gloss.
How To Make Glitter Pumpkins – Step By Step
You’ll need to do your pumpkin in at least two stages. For larger pumpkins you may want to work on smaller sections at a time. For this tutorial, with the help of my little assistant, we’ll be working on a small pumpkin and will do it in two sections.
When decorating with glitter it doesn’t matter if you work from the top down or bottom up. Either way will look great.
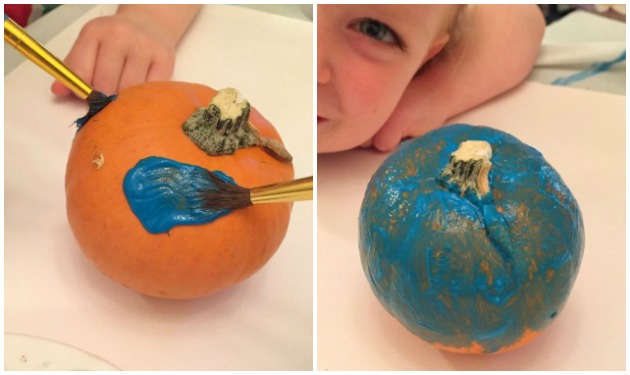
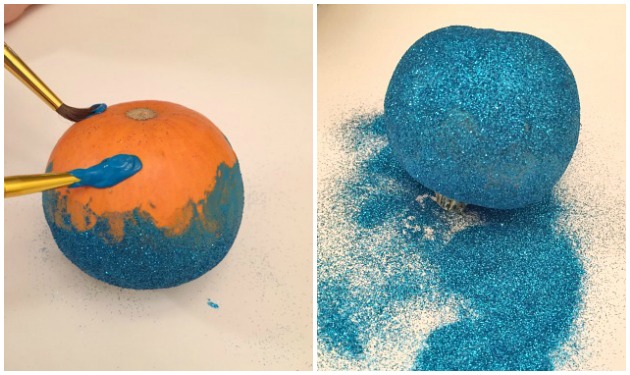
Start by either painting with glue or paint. Apply a somewhat even coat to the top half of the pumpkin. It doesn’t have to be perfect but you do need to coat the entire surface and it does help if there aren’t areas with thick, globby paint or glue.
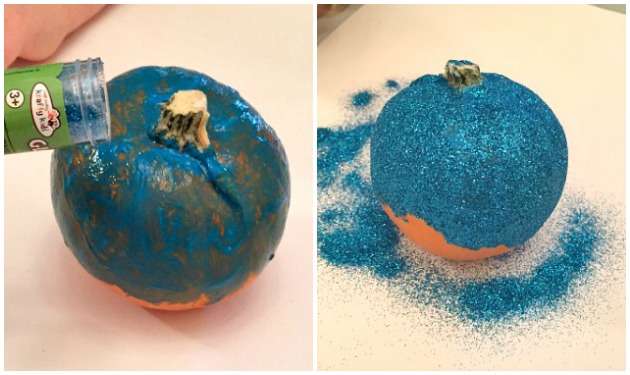
While the paint or glue is still wet sprinkle the glitter over top. Small kids can be a bit over-zealous with the glitter so you may want to hold the glitter with them and guide their hand while they shake. As you can see it’s very important to have a sheet of paper underneath to catch the excess glitter.
Set your pumpkin aside to dry and carefully scoop the excess glitter back into its container.
When the pumpkin is dry you can flip it over and repeat on the other side. Allow to dry.
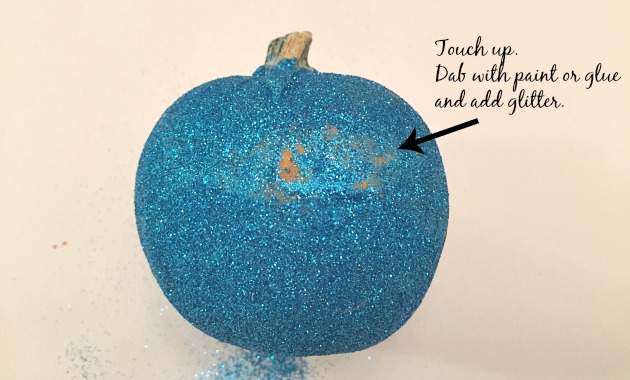
Inevitably there will be a few small patches that didn’t receive paint or glitter. You can fill these areas in now by dabbing a little paint or glue then sprinkling with glitter.
Then can think about what you want to do with the stem (more on this later).
The final step is to seal your glitter so it doesn’t flake off everywhere. I omitted this step when I made these pumpkins and I paid the price. Ok, it wasn’t all that bad but there was a little shower of glitter wherever I moved the pumpkins. So I suggest, and yes I’ll be doing this next time, finishing off your pumpkins with one or two coats of sealant such as Mod Podge spray sealer. Use the glossy one, not the matte finish sealer, for best results.
Different Ways to Customize Your Glitter Pumpkin
There are several subtle variations on the above technique that will give you different results.
1) Color scheme. The most obvious is color choice. This will have a huge impact on your overall design.
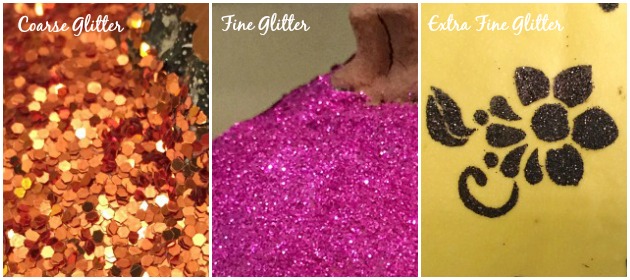
2) Size of glitter. Another important factor to consider when choosing your glitter is the size of glitter. The size you choose has a direct impact on the amount of light reflected back to your eye.
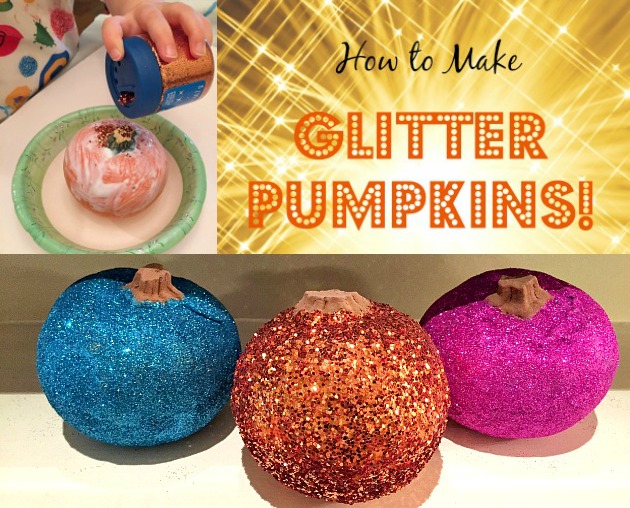
Coarse glitter will give you a chunkier look. Larger patches of light will be reflected but there will also be larger dark areas. Some say that coarse glitter can be tacky but I think there is a time and place for tacky. My copper pumpkin may look like it’s wearing an ’80s sequin dress but I think it looks great and it makes me smile.
Fine glitter creates a softer and more elegant look. The size of reflected light is smaller and more plentiful with minimal dark patches. Most likely this will be the size you frequently use.
Extra Fine glitter can also be used but being finer and more light weight it’s messier and heavily influenced by static. Because the pieces of glitter are so small the amount of light reflected is very small but more frequent. I used this for another project (tutorial coming soon) and although I liked how it looked for that pumpkin, I don’t know that I would ever choose to decorate the whole pumpkin this way.
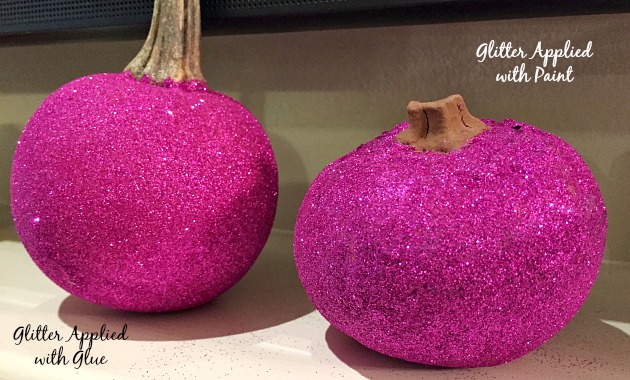
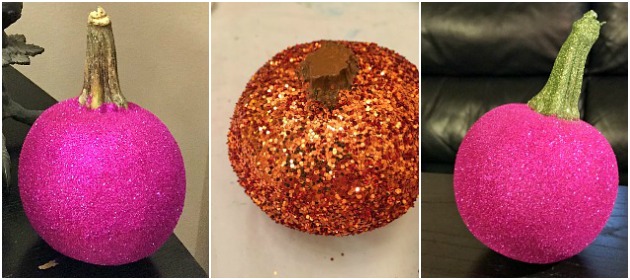
3) Paint vs glue. You can use either paint or glue, both work equally well. But, using paint of the same color of your glitter will result in a deeper and more intense color. If you choose to use glue, some of the warmth of the pumpkin’s orange color will come through. For this reason you should choose colors that work with orange. The pumpkins shown below are decorated with the same glitter. The only difference is the method of application.
4) Stem Decoration. You have several options when it comes to your pumpkin stem.
- Leave it au naturel.
- Paint it brown or another color.
- Paint or glue and apply glitter the same color as the rest of the pumpkin.
- Apply another color of glitter.
More Ways to Decorate Your Pumpkin with Glitter
There are so many options once you pull out the glitter. Here are a few more tutorials to get your creative juices flowing:
- Glitter Glam Pumpkins & Pedestals. Creating designs on your pumpkin with glitter is a great way to add some glamor.
- Painted Pumpkins with Glitter Stems. Creating solid colored pumpkins with a sparkly glitter stem is another beautiful option.
- Rainbow Glitter Pumpkin. This is an awesome tutorial for those fond of glitter and color. Use paint and glitter to turn your pumpkin into a rainbow of color.
I hope this tutorial on how to make glitter pumpkins has been informative and has given you some inspiration to create amazing and flashy pumpkins this Halloween.
Happy Pumpkin Decorating!
Images:
All images by Isle of Halloween

No comments yet.